

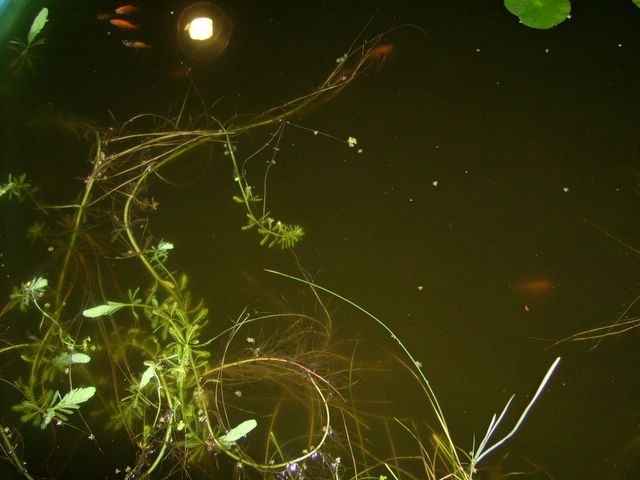
 If you have fish and your pond is really cloudy then you probably need a filter. A simple biological filter from the store will cost you $20 minimum WITHOUT a pump to make it work. A pump will cost you another $20 on average, making the cost of the shoddiest possible store bought biological filter about $40. Better filters, of course, cost more money, with some of them easily rising into the hundreds of dollars. Most folks decide not to have a piond because of the costs imvolved in maintenence, but I hope this little DIY makes it easier on a lot of people to have their own pond.
What you need to begin:
bag of polyester quilt batting
large bag of small lava rock
1/2 yard toole fabric
3 gallon storage tub with lid
60gph submerssible water pump with fountain attatchment
($1 more than without attatchment where we bought it)
sharp knife
marker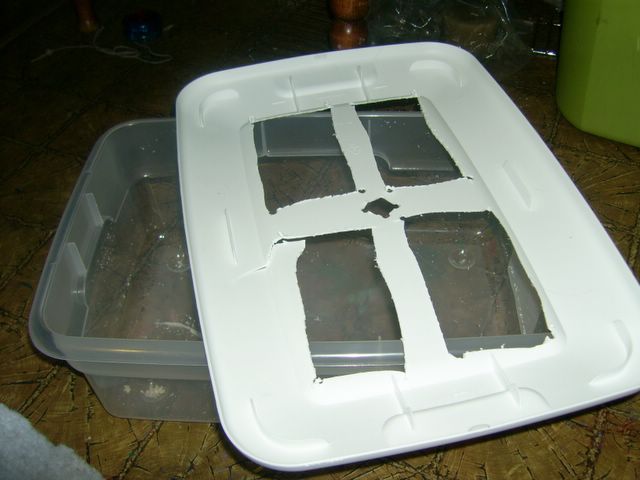
Step 1
Measure fountain attatchment tube for pump and mark out a hole for it in the center of the lid. Use marker to mark out 4 equal sections on lid of storage container and cut out hole and sections with sharp knife to the best of your ability.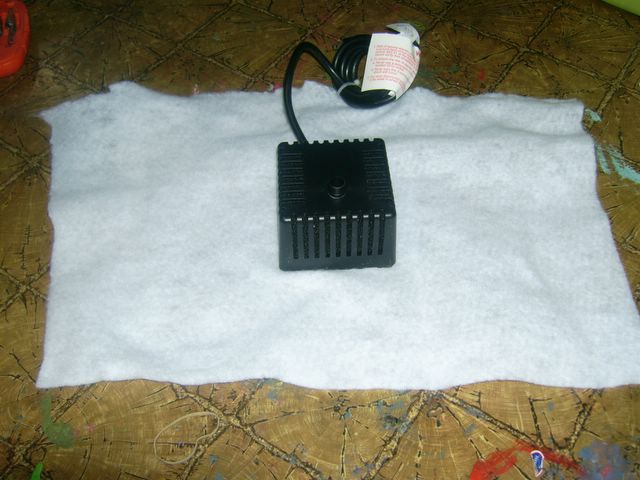
Step 2
Measure and cut a peice of the quilt batting to a size that will wrap around the filter. Make sure pump is on "high/ +" setting before wrapping!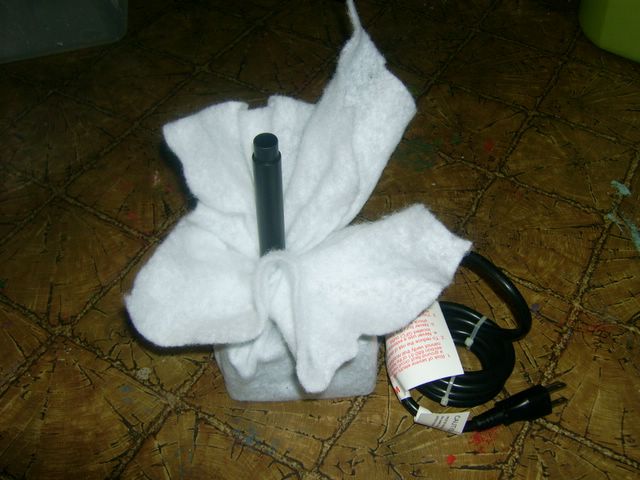 Step 3
Insert the fountain attatchment into the filter, and wrap the batting around the filter, securing it with a rubber band to the fountain attatchment. This provides an extra layer of protection from sediment and such around the pump itself.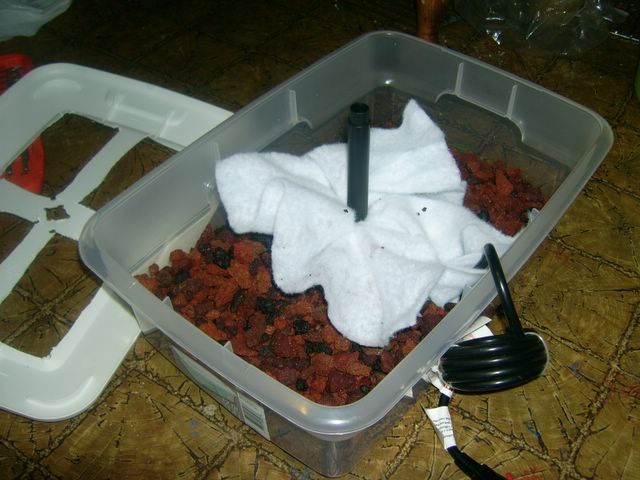
Step 4
Put wrapped pump into the center of the bottom of the storage tub and surround with small lava rocks, filling the tub up to the inside lip. The rocks are where the benificial bacteria that eat ammonia (cleaning the pond and clearing the water) will live.
Step 5
Flatten the batting wrapped around the fountain attatchment onto the top of the lava rocks.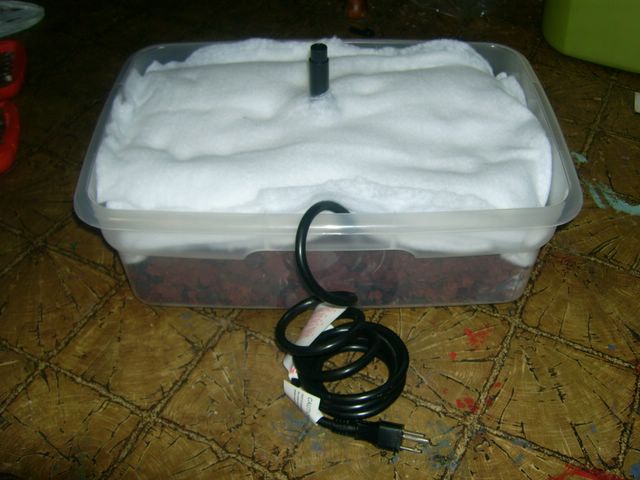 Step 6
Fold at least 5 layers of the batting (until it is up at the top of the tub and starting to puff over a tiny bit) over the rocks providing a good layer to make sure no small particles of junk get caught in the rocks. Cut a hole in the layered (folded) batting to allow the fountain bit to stick out the top.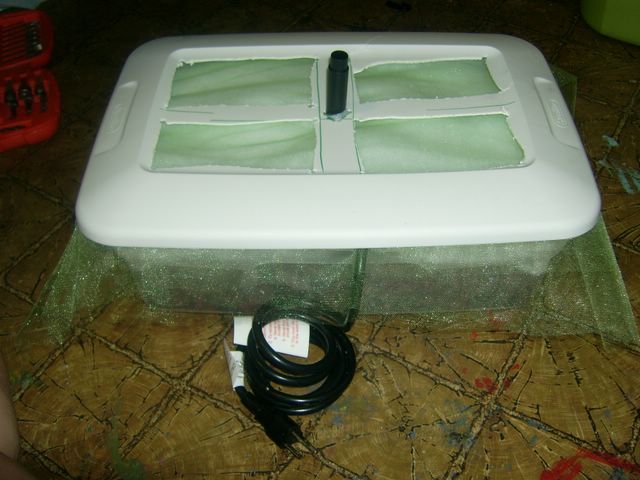
Steps 7-9
Place several layers of the toole on top of the batting, again cutting holes for the fountain attatchment. This is your first layer of filtration, keeping out the largest particles. Cut a notch in the side of the tub where the cord comes out to allow the lid to close flush with the tub. Place and lock lid in place on tub.
Step 10
Place entire contraption into the pond, making sure that it is completly submerged (except for the top of the fountain attatchment) Step 11
Let filter sit in the pool for 5 minutes so that it can fill with water properly.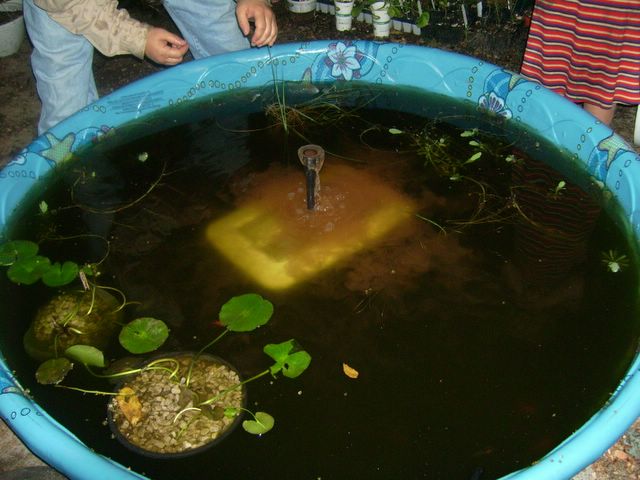
Step 12
Plug in pump and watch the sediment from the lava rocks spread out and settle everywhere in the pool. This is much like rinsing an activated carbon fish tank filter before the first use, and is not harmful to your pond.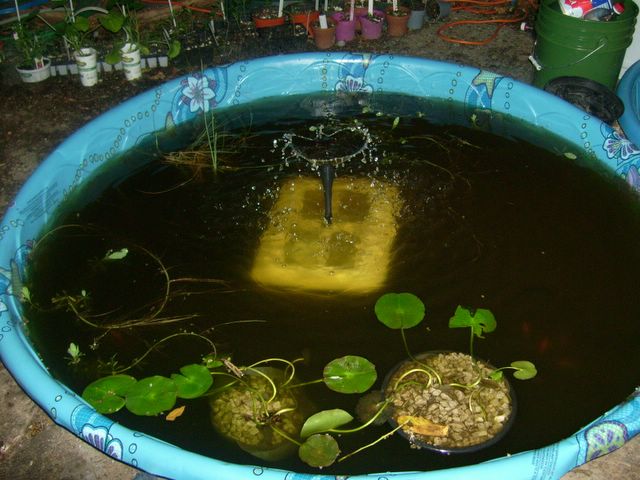
Voila, a working, filtering, fountain!
(Note: A biological filter can take several days to populate with benificial bacteria, and can take a week before it operates at optimum effecincey. To speed up this process, you may purchase a natural barley additive for ponds that has been innoculated with the bacteria and add it to your pond water before the installation of the filter like we did.)


Thursday, June 08, 2006
DIY: Biological Pond Filter & Fountain
![]()
![]()
Subscribe to:
Post Comments (Atom)


No comments:
Post a Comment